Wednesday, October 29, 2008
Kitties!
Could have died.
If you haven't noticed all the pictures I have with my cat in them, go look. He can be so ridiculous sometimes!
I charted a V for Vendetta filet that I want to turn into a blanket and sell. It has the V and circle with 'Remember Remember the 5th of November' behind in white letters. It will prolly take forever, but oh well.
Yarn Stash/ Blanket Pattern (Lemonade Stitch)
Augh! I looks like a craft store threw up in my house! I have yarn everywhere. I need to find a fun project that will use all my bits and bods up. I was thinking of either making a chain mail blanket, a multicolor granny square blanket, or making a gazillion hats. I dunno...
I just got ten skeins of teal TLC in, which I'm totally excited about. I'm going to try my hand at some Irish Crochet and make a scarf for my mema. I'm also making a hat for Grandma Swan and a shrug for my Etsy. It's a cute little dance shrug that I really like.
You all know I can't resist giving another pattern, so I'll share a secret with you all that has been my success at every baby shower I've ever attended. Wow your friends and make the neighbors jealous, I call it the lemonade stitch.
Pattern Notes:
The pictures I'll show are for lefties. Sorry righties, but I can't use my right hand for anything. If it really bothers you, copy and paste it into paint and flip it.
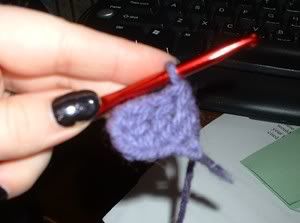
This pattern starts at the corner and works diagonally to make a diamond.
Also, I'm only going to make a small version to show, because I don't need to make anything right now.
Materials:
Baby Blankey- 20oz. of baby yarn, US size H/5mm hook
Adult Blankey- 65oz. of medium worsted yarn, US size H/5mm hook
Gauge:
No gauge, but make sure your stitches are even.
Pattern:
Row 1- Ch 6, dc in fourth ch from hook and in next two chs. 3dc, 1 ch 3 sp.
Row 2- Ch 6, turn. Dc in fourth ch from hook and in next two chs. Sl st in ch 3 sp, ch 3, 3 dcs in same sp.(Makes a heart shape, also makes three blocks total)
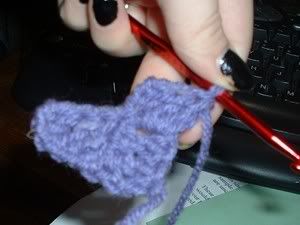
Row 3- Ch 6, turn. Dc in fourth ch from hook and in next two chs. *Sl st in ch 3 sp, ch 3, 3 dcs in same sp.* twice.
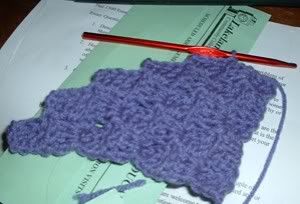
Rows 4-Desired Width- Continue with stitch, adding the extra block until the side is the desired width of the piece.
Creating a rectangular shape:
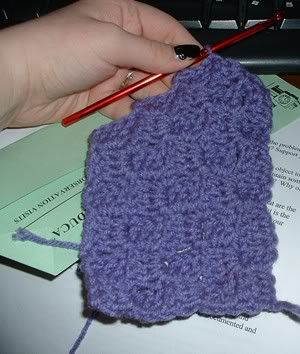
Row 1- Instead of chaining 6, turn and sl st in the tops of the second and third dc and into the ch 3.(We'll call this a Dec) Continue pattern as before, increasing at opposite end until desired length. When you reach the end where you've dec, sl st in the ch 3 sp, then turn and sl st in the tops of the dcs as before.
Decreasing:
Instead of increasing at one end and decreasing at the other, you will decrease on each end until you reach the last block. Cut yarn, weave in ends.
You can also make scarves and shawls with this pattern. For a shawl, you will just end when you have reached the desired width without all the bother of making the length.
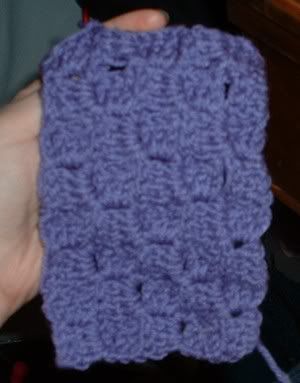
Here's a blankey I finished last night for a girl I work with:

I just got ten skeins of teal TLC in, which I'm totally excited about. I'm going to try my hand at some Irish Crochet and make a scarf for my mema. I'm also making a hat for Grandma Swan and a shrug for my Etsy. It's a cute little dance shrug that I really like.
You all know I can't resist giving another pattern, so I'll share a secret with you all that has been my success at every baby shower I've ever attended. Wow your friends and make the neighbors jealous, I call it the lemonade stitch.
Pattern Notes:
The pictures I'll show are for lefties. Sorry righties, but I can't use my right hand for anything. If it really bothers you, copy and paste it into paint and flip it.
This pattern starts at the corner and works diagonally to make a diamond.
Also, I'm only going to make a small version to show, because I don't need to make anything right now.
Materials:
Baby Blankey- 20oz. of baby yarn, US size H/5mm hook
Adult Blankey- 65oz. of medium worsted yarn, US size H/5mm hook
Gauge:
No gauge, but make sure your stitches are even.
Pattern:
Row 1- Ch 6, dc in fourth ch from hook and in next two chs. 3dc, 1 ch 3 sp.

Row 2- Ch 6, turn. Dc in fourth ch from hook and in next two chs. Sl st in ch 3 sp, ch 3, 3 dcs in same sp.(Makes a heart shape, also makes three blocks total)

Row 3- Ch 6, turn. Dc in fourth ch from hook and in next two chs. *Sl st in ch 3 sp, ch 3, 3 dcs in same sp.* twice.
Rows 4-Desired Width- Continue with stitch, adding the extra block until the side is the desired width of the piece.
Creating a rectangular shape:
Row 1- Instead of chaining 6, turn and sl st in the tops of the second and third dc and into the ch 3.(We'll call this a Dec) Continue pattern as before, increasing at opposite end until desired length. When you reach the end where you've dec, sl st in the ch 3 sp, then turn and sl st in the tops of the dcs as before.

Decreasing:
Instead of increasing at one end and decreasing at the other, you will decrease on each end until you reach the last block. Cut yarn, weave in ends.


You can also make scarves and shawls with this pattern. For a shawl, you will just end when you have reached the desired width without all the bother of making the length.
Here's a blankey I finished last night for a girl I work with:

Tuesday, October 21, 2008
Fanged Cat Hat


This is my latest creation. As you can see, my cat enjoyed it thoroughly. I call it the 'Fanged Cat Hat' which will be posted on my Etsy Shop when I can get a model other than my cat.
I'd put up the pattern, but I think I would have a hard time explaining what I actually did even to myself. Basically, I took a basic beanie cap, added ears a few rows in, put some sort of a cat eye pattern and some ear flaps with a string of scs. Then I added some length to the ears, made some quick little fangs and put a pink X on the front for a nose. Simple as that.
Monday, October 20, 2008
Flapper Hat

Here is the Flapper Hat that can be bought at my Etsy Shop. I made the pattern from what I know about the anatomy of hats, so if something doesn't make sense, please let me know.
Materials:
1 ball of worsted yarn
US size G hook
Stitch marker (I use a safety pin)
Special Stitch:
Cluster (Cl)- *Yo, insert hook into ch space and draw up loop, yo and pull through 2 loops* 3 times, yo and pull through all loops on hook.
Pattern Note: this pattern is worked in rounds.
Hat-
Ch 4, sl st in last ch from hook
Rnd 1- ch 3, Cl with the ch 3 counting as the first loops drawn up (you will only draw up 2 more instead of three), *ch 3, Cl* 4 times, ch 3, join with sl st in first Cl. This should make a five petal flower look.
Rnd 2- *ch 5, sc in ch 3 sp, ch 5, sc in Cl* 5 times. Do not join as this will create a seam. Place stitch marker in last stitch.
Rnd 3- *ch 5, sc in next ch 5 sp from previous rnd, ch 5, sc is same ch 5 space* 9 times.
Rnds 4-7- *ch 5, sc in next ch 5 space* around. Don't worry as much about the amount of round as length, this should be about 4-5" in length.
Rnds 8-13- *ch 4, sc in next space* around, again it's all about length. This is justa suggestion of length, though it should fit most female heads.
Rnd 14- ch 1 * 3 sc in ch 4 sp, sc in sc* around end with sl st in ch. (64 stitches including ch)
Rnds 15-18- ch 1, sc around, end in sl st in ch.
Cut yarn, weave in ends.
Flower- (Borrowed this from CreativeYarn)
Ch 6, join to make ring with sl st.
Rnd 1- ch3 (count ad dc), 15 dc in ring,sl st to third ch of beg. ch3. (16 dc)
Rnd 2- ch3 (count ad dc), dc in same space as joining, *2dc in next dc*. Repeat from * around, sl st to third ch of beg. ch3. (32 dc)
Rnd 3- *ch4, skip next 2 dc, sc in next dc*. Repeat from * around ending with sl st to previous joining st.
Rnd 4- *7 dc in next ch4 space, sc in next sc*. Repeat from * around, ending with sl st to previous joining st.
Cut yarn, weave in ends.
Assembly:
Sew flower on the band of hat where the seam is. Simple as that.
Subscribe to:
Posts (Atom)


